Easily View Your Flight Plans at a Glance. Show or Hide Flight Plan Visual Details
FlightPlanner makes your flight plan’s easily viewable with viewing options. You can modify your view of the flight plan by hiding or showing certain elements of that flight plan. These can range from hiding/showing flight lines, camera stations, the capture boundary, and footprints.
We’ll also talk about other viewing options, such as how to zoom in/out, viewing flight plan information, and how to show/hide the currently active streaming map and imported maps.
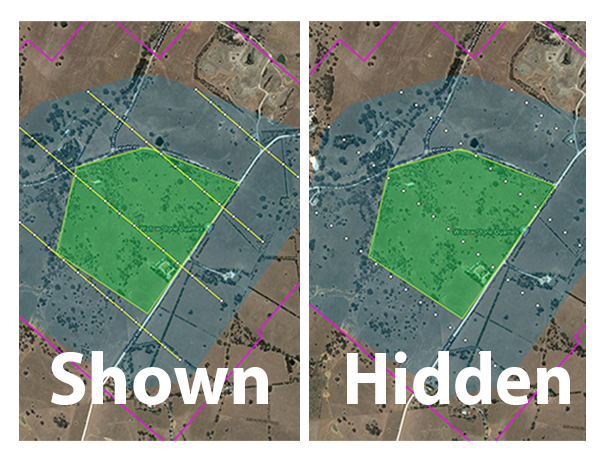
View Options of a Flight Plan. Show or Hide Flight Lines
A flight line indicates where your aircraft needs to travel along to complete the aerial survey. A flight line is presented as a yellow line. By default, flight lines are automatically shown, you may choose to hide them.
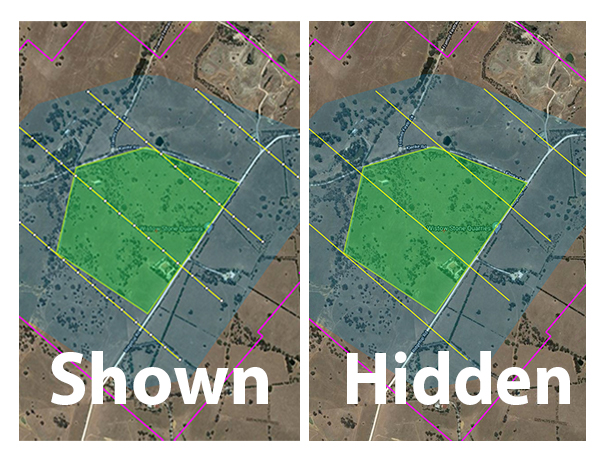
Show or Hide Camera Stations/Trigger Points
A camera station/trigger points indicate where your camera will take its shots within your flight plan. These camera stations are the white dots you typically see on a flight plan. By default, camera stations are automatically shown.
Show or Hide Capture Boundary
The purple outline around your flight plan is the capture boundary showing the overall coverage your camera will capture during your flight. This visual indicator is useful to ensure you don’t miss capturing anything important. By default, the capture boundary is automatically shown.

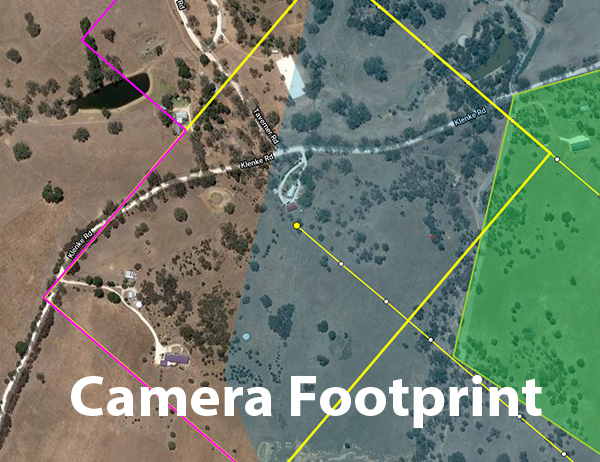
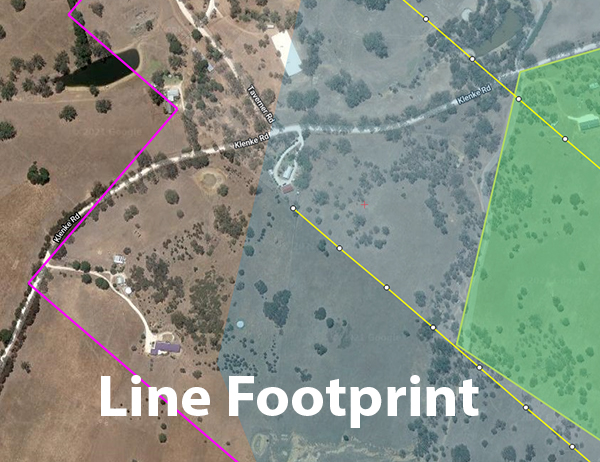
Show or Hide Camera/Line Footprints
Footprints represent the visual coverage a camera station will have. This is useful to see what camera stations will capture what terrain within your flight plan.
Footprints can either be shown as a line footprint or a camera footprint. By default, both camera and line footprints are hidden.
Show or Hide Imported Background Maps
If you have imported background maps, such as DEMs you may choose to hide or show all imported maps.
Show or Hide Streaming Map
The streaming map is the background map, by default Google Maps. You can choose to hide the currently shown live streaming map, this replaces the map with a black screen.
Other View Options for a Flight Plan
- Zoom In and Out: You can zoom in and out of your view by clicking the corresponding buttons, or you may simply scroll your mouse wheel to do the same
- Fit to Screen: This allows you to centre your view on your flight plan
- Flight Plan Information: This shows you crucial information about your flight plan, including total run length, number of frames and turns, ground sample distance, side, and forward overlap, etc